Import your jobs
Applies to v1.7+ · ~5 min read · Import guides
Create a reusable job mapping from a representative daily file, then use that mapping when loading future job files with the same columns.
Before you start
Have a representative jobs file ready. Check that it includes the pickup and delivery information needed for planning.
Create the job mapping during onboarding
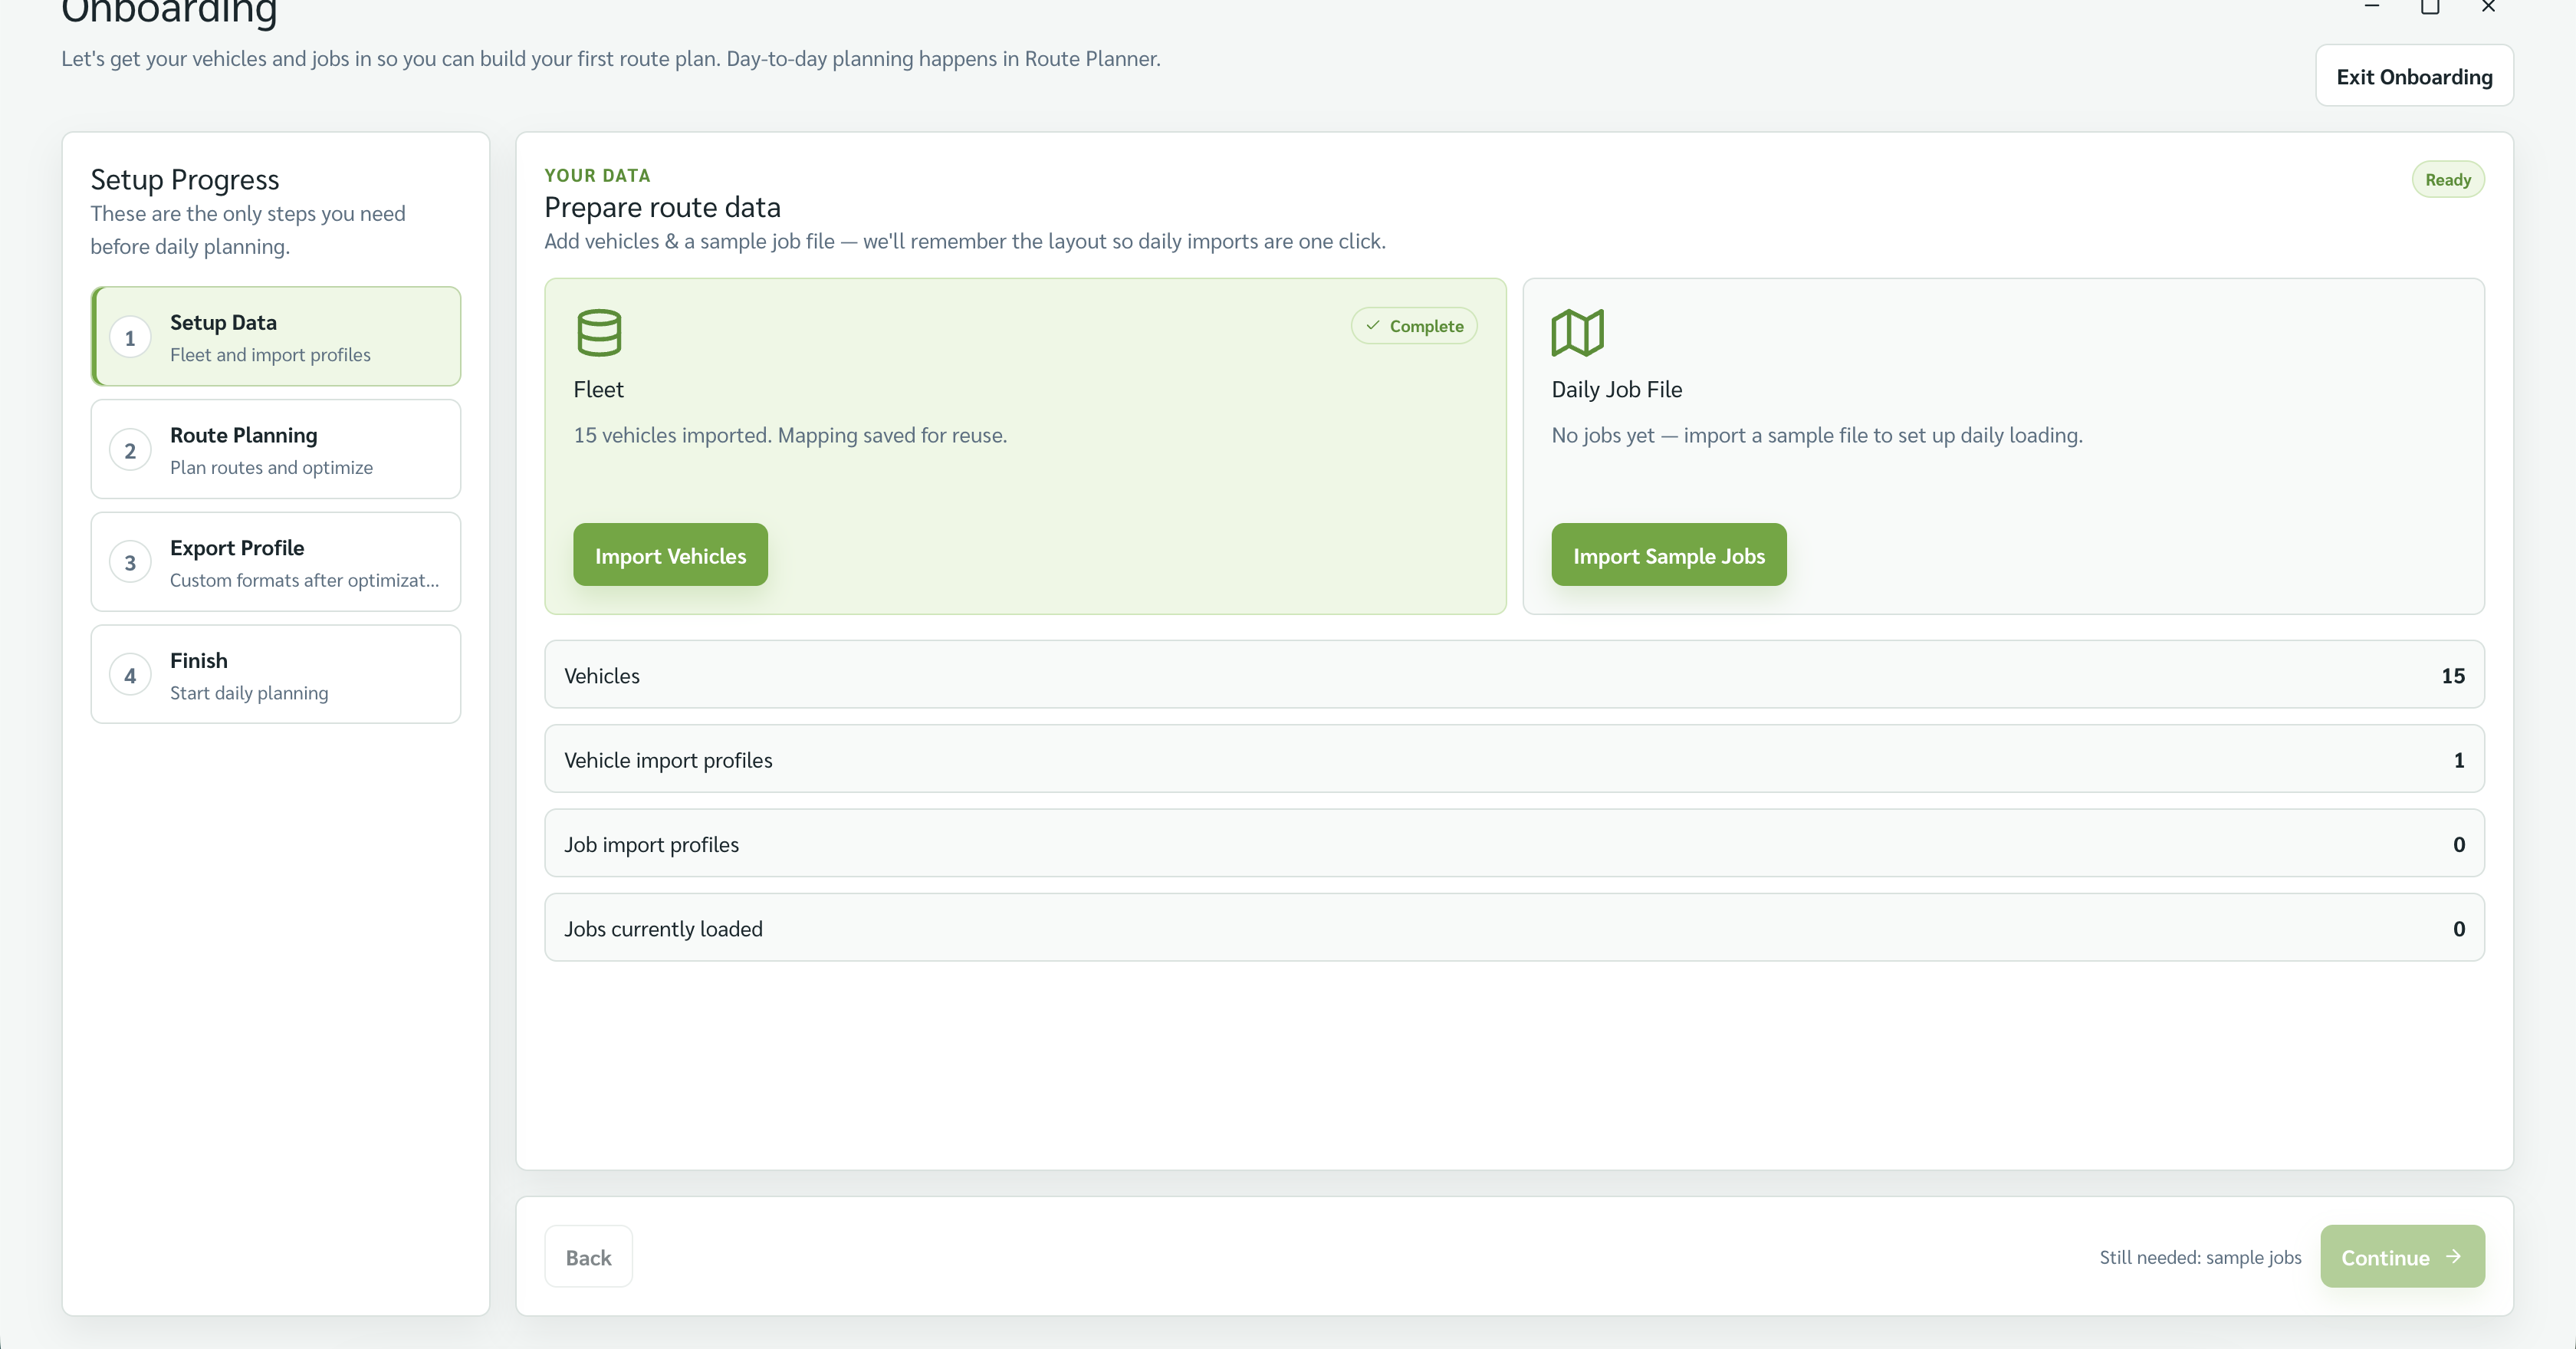
- On Step 1 · Setup Data, find the Daily Job File card and select Import Sample Jobs.
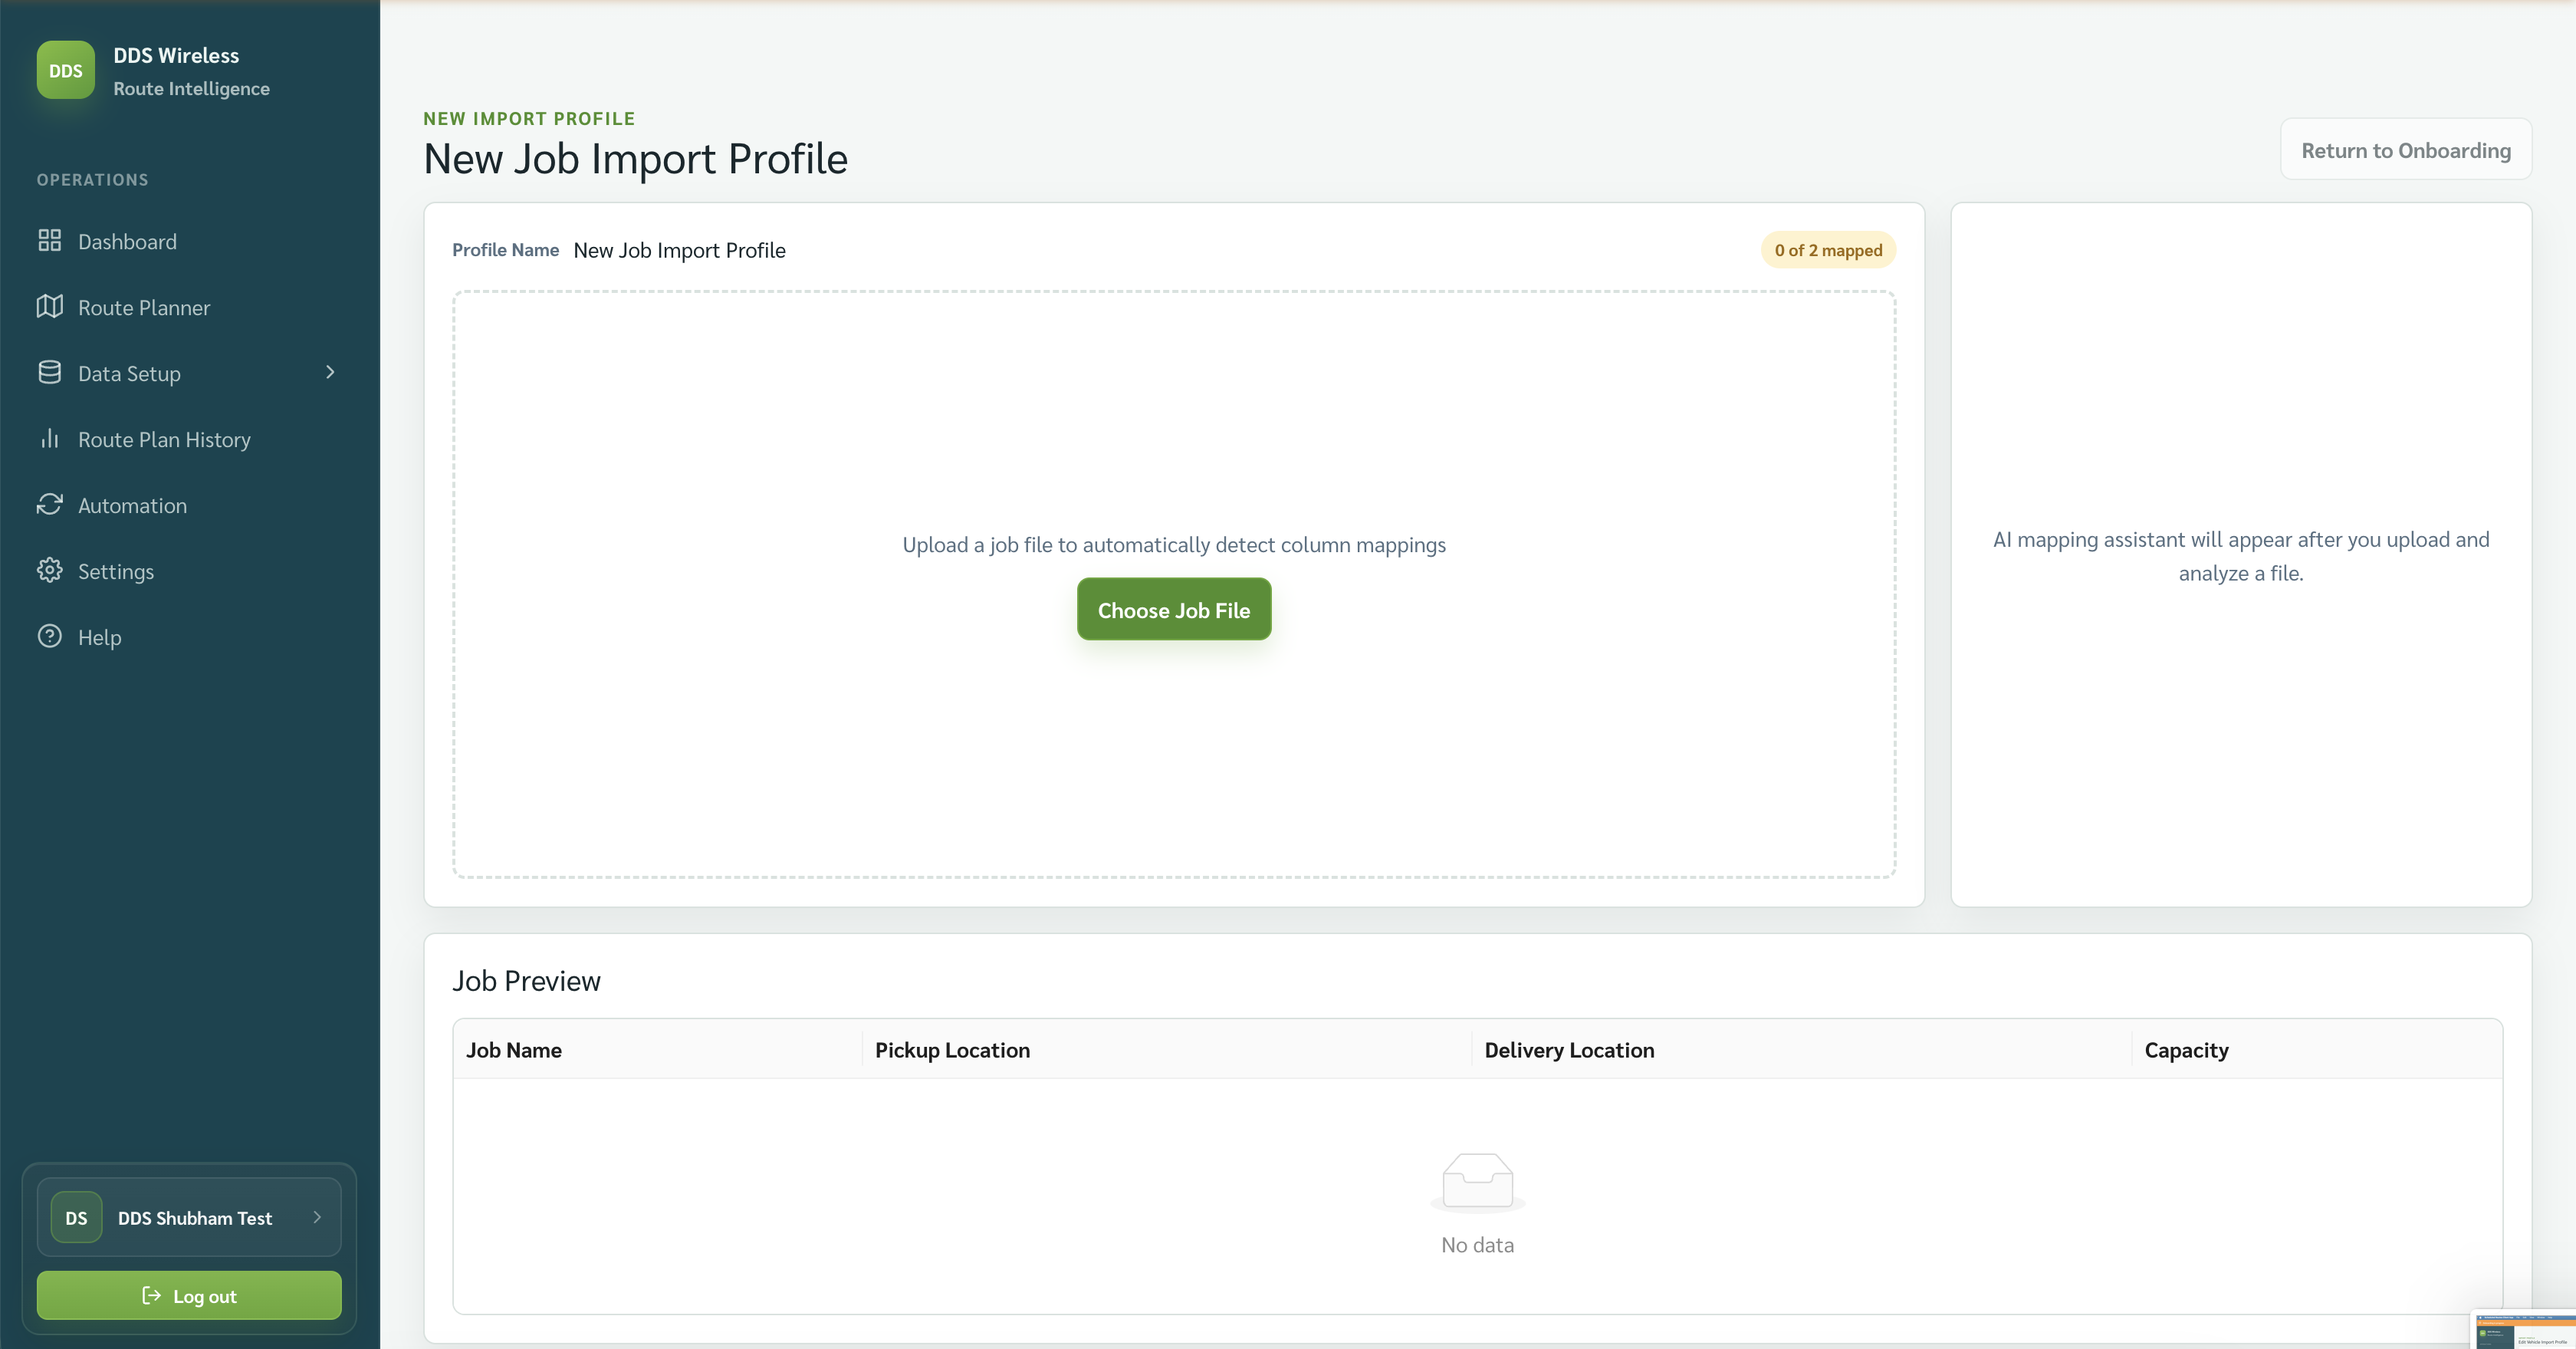
- On New Job Import Profile, select Choose Job File and choose the representative jobs file.
-
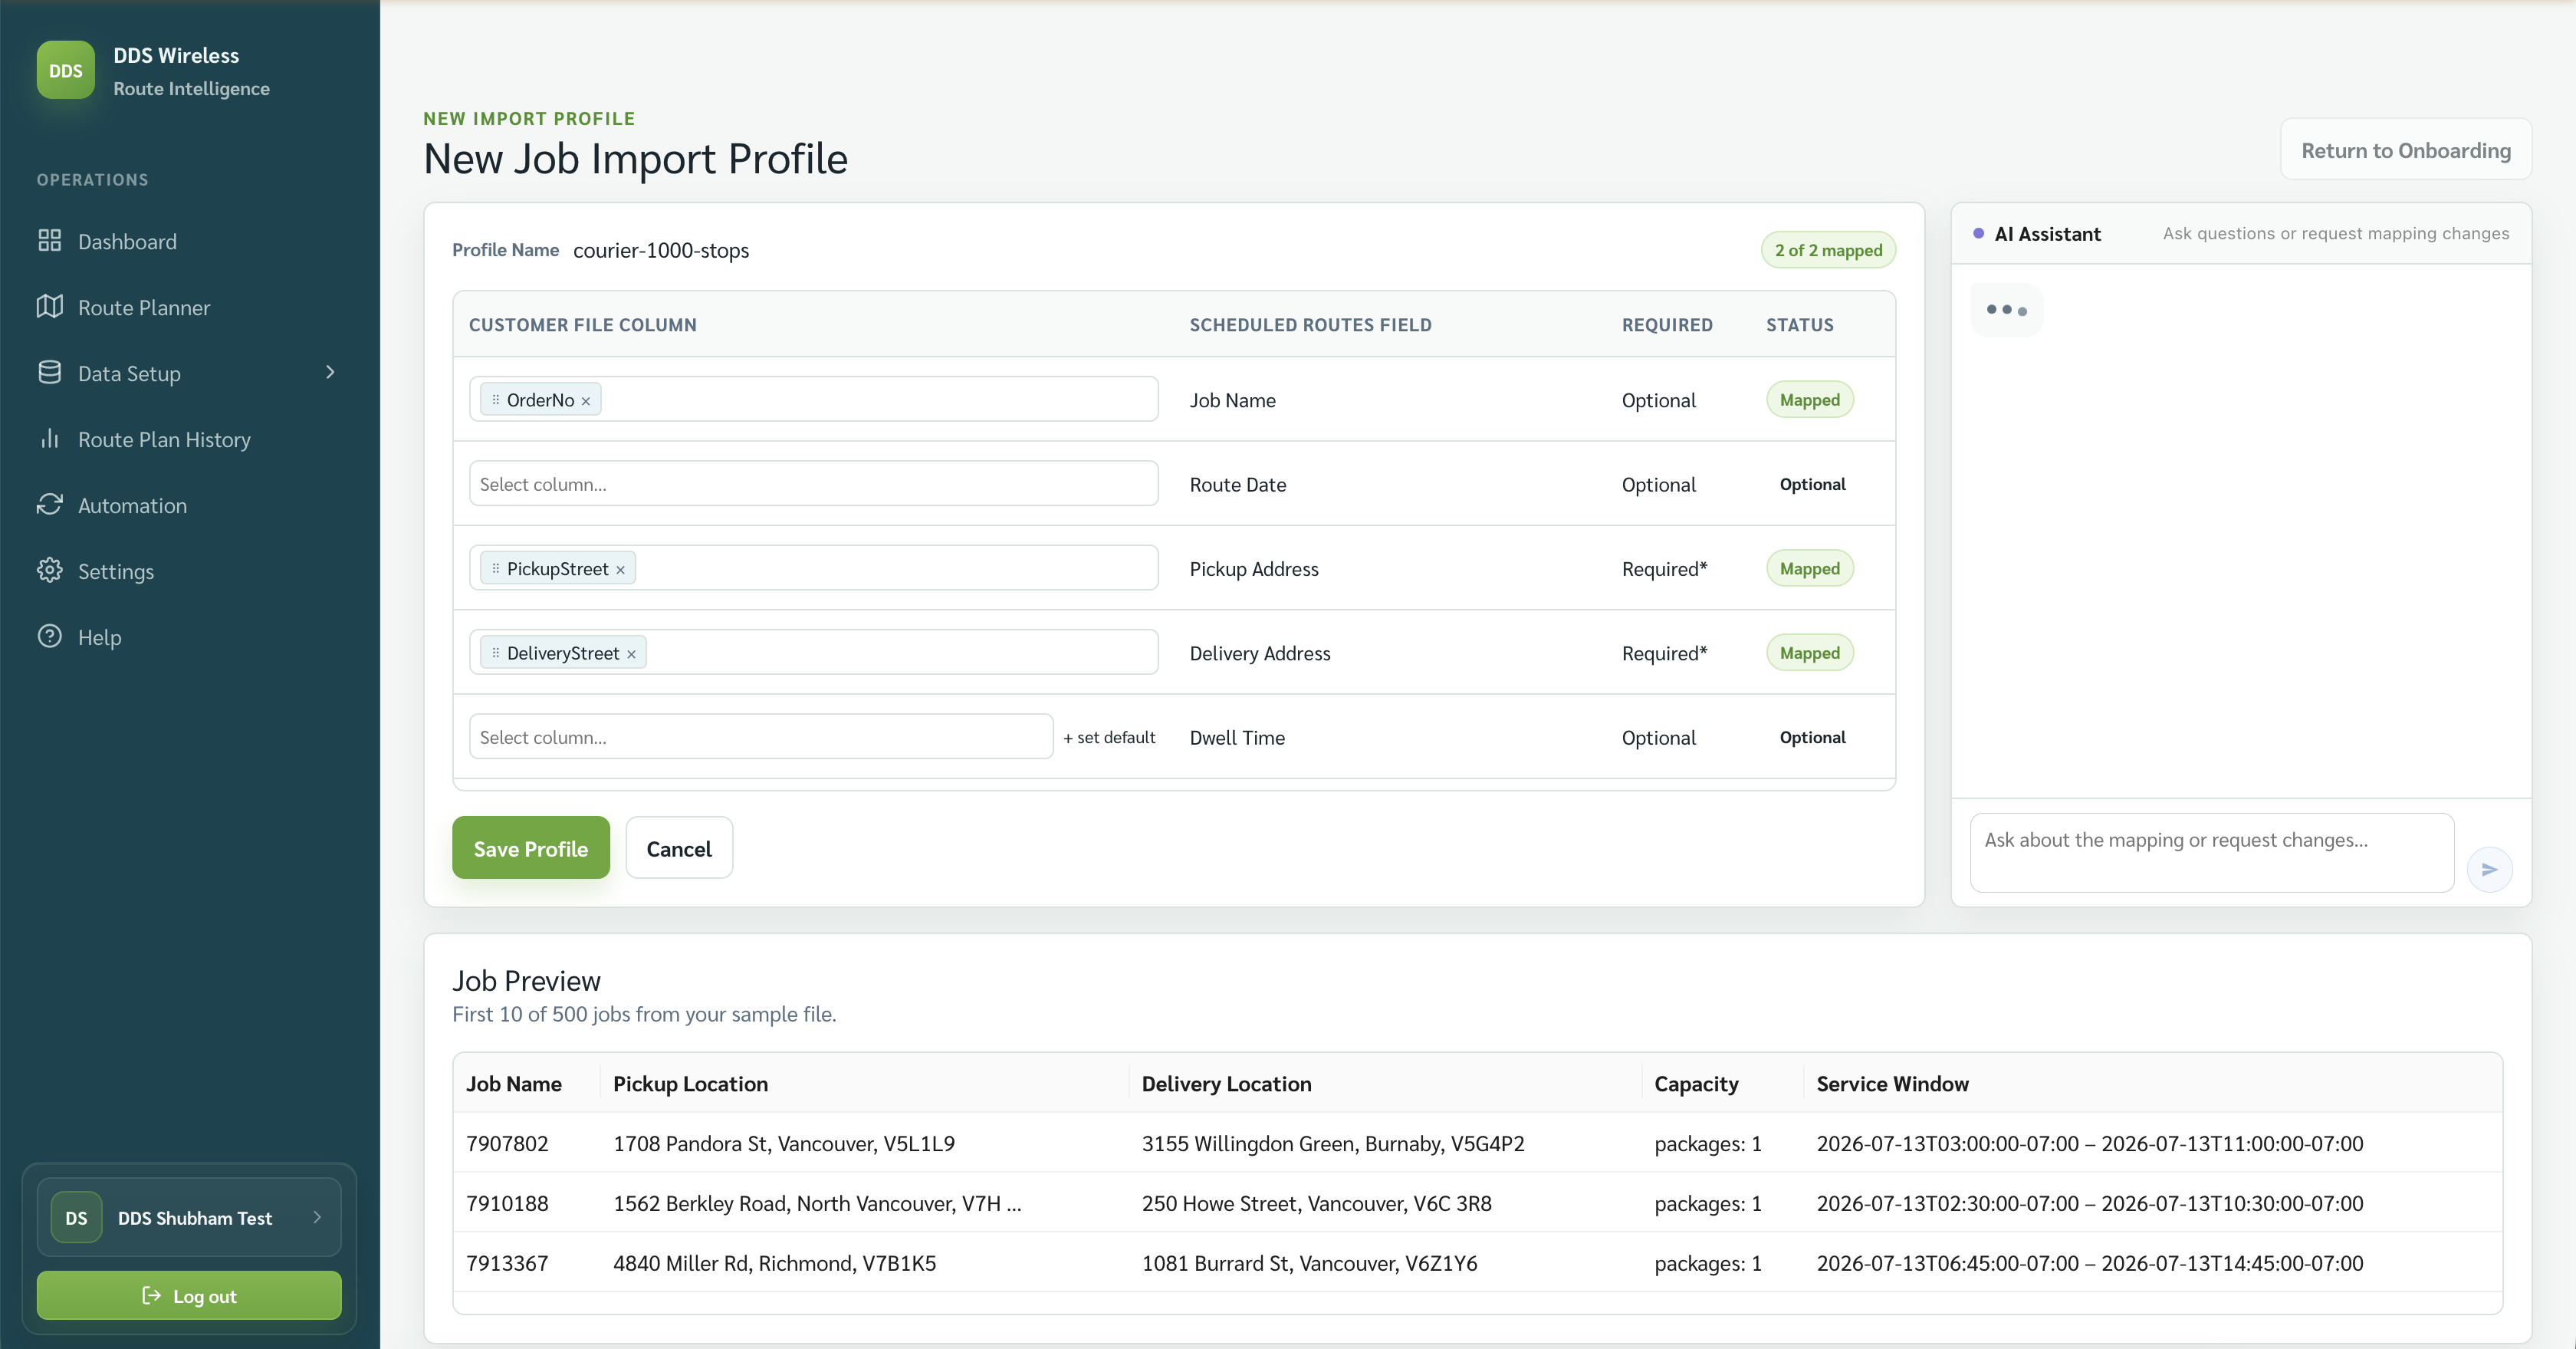
On Edit Job Import Profile, review each customer column and its Scheduled Routes field.
-
Confirm the required address fields are mapped. The supplied screen shows Pickup Address and Delivery Address as required; it also shows optional fields including Job Name, Route Date, Dwell Time, and window fields.
-
Review Job Preview. Compare the job name, pickup location, delivery location, dwell time, capacity, and service window with the source file.
-
If a match is wrong, choose the correct customer column. Use the AI Assistant panel to ask about the mapping or request a change.
-
Select Save Profile.
Confirm the saved job mapping
-
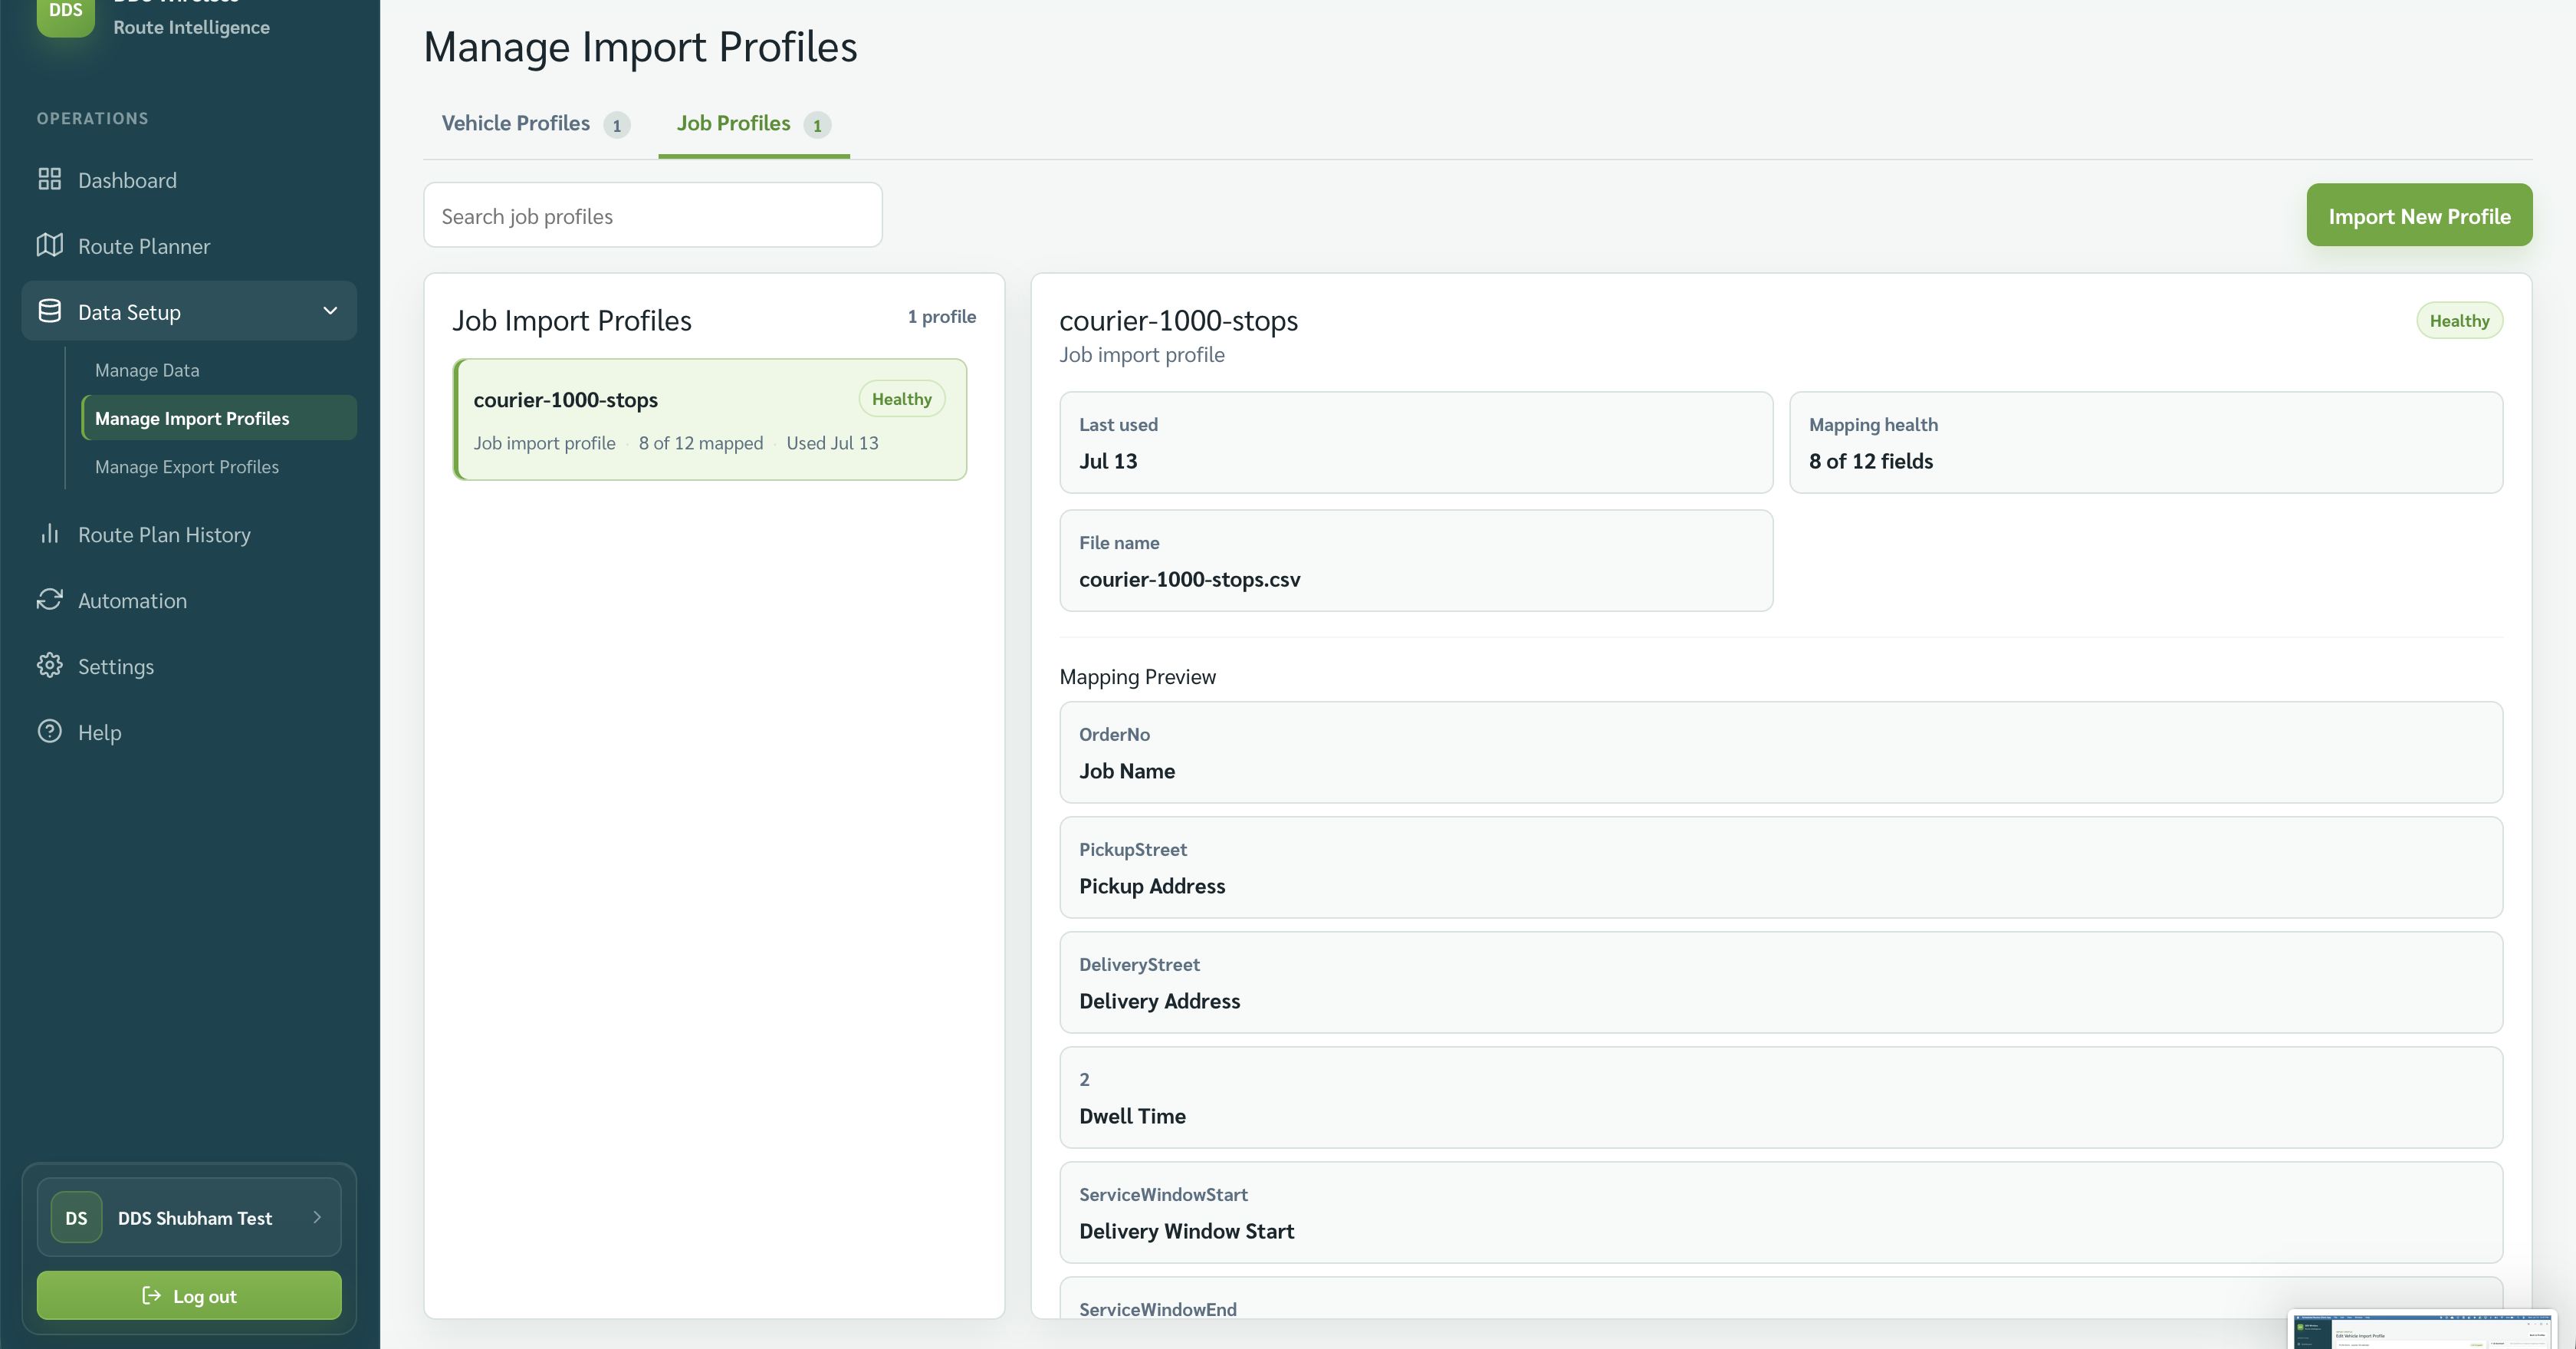
Open Data Setup → Manage Import Profiles and select Job Profiles.
-
Select the saved profile and review its file name, mapping health, and mapping preview. Select Edit Mapping whenever the daily file's column layout changes.
Load today's jobs
- Open Route Planner and confirm the route date.
- On Import & Validate Jobs, browse for today's file and apply the saved job mapping.
- Review the file in the staging review. Nothing enters the plan until you select Validate & Import.
The modal lists JOB, DATE, TYPE, and STATUS. Check the Action Summary at the top, use All or On date to filter the rows, and review the footer tally for jobs in the file, staged for the route date, and discarded.
| Job date | Available handling |
|---|---|
| On the route date | Staged automatically. |
| No date | Assigned to the route date. |
| Future date | Schedule for future, Move to route date, or Discard. |
| Past date | Move to route date or Discard. |
Choose the merge option that matches your intent:
| Merge option | What it does |
|---|---|
| Add new only | Adds new jobs and skips matches already on the route date. |
| Add & update | Adds new jobs and updates existing unlocked matches. |
| Replace selected date | Replaces unlocked jobs for this route date only. |
Locked jobs are protected
Locked jobs are never overwritten or dropped. They are reported as skipped.
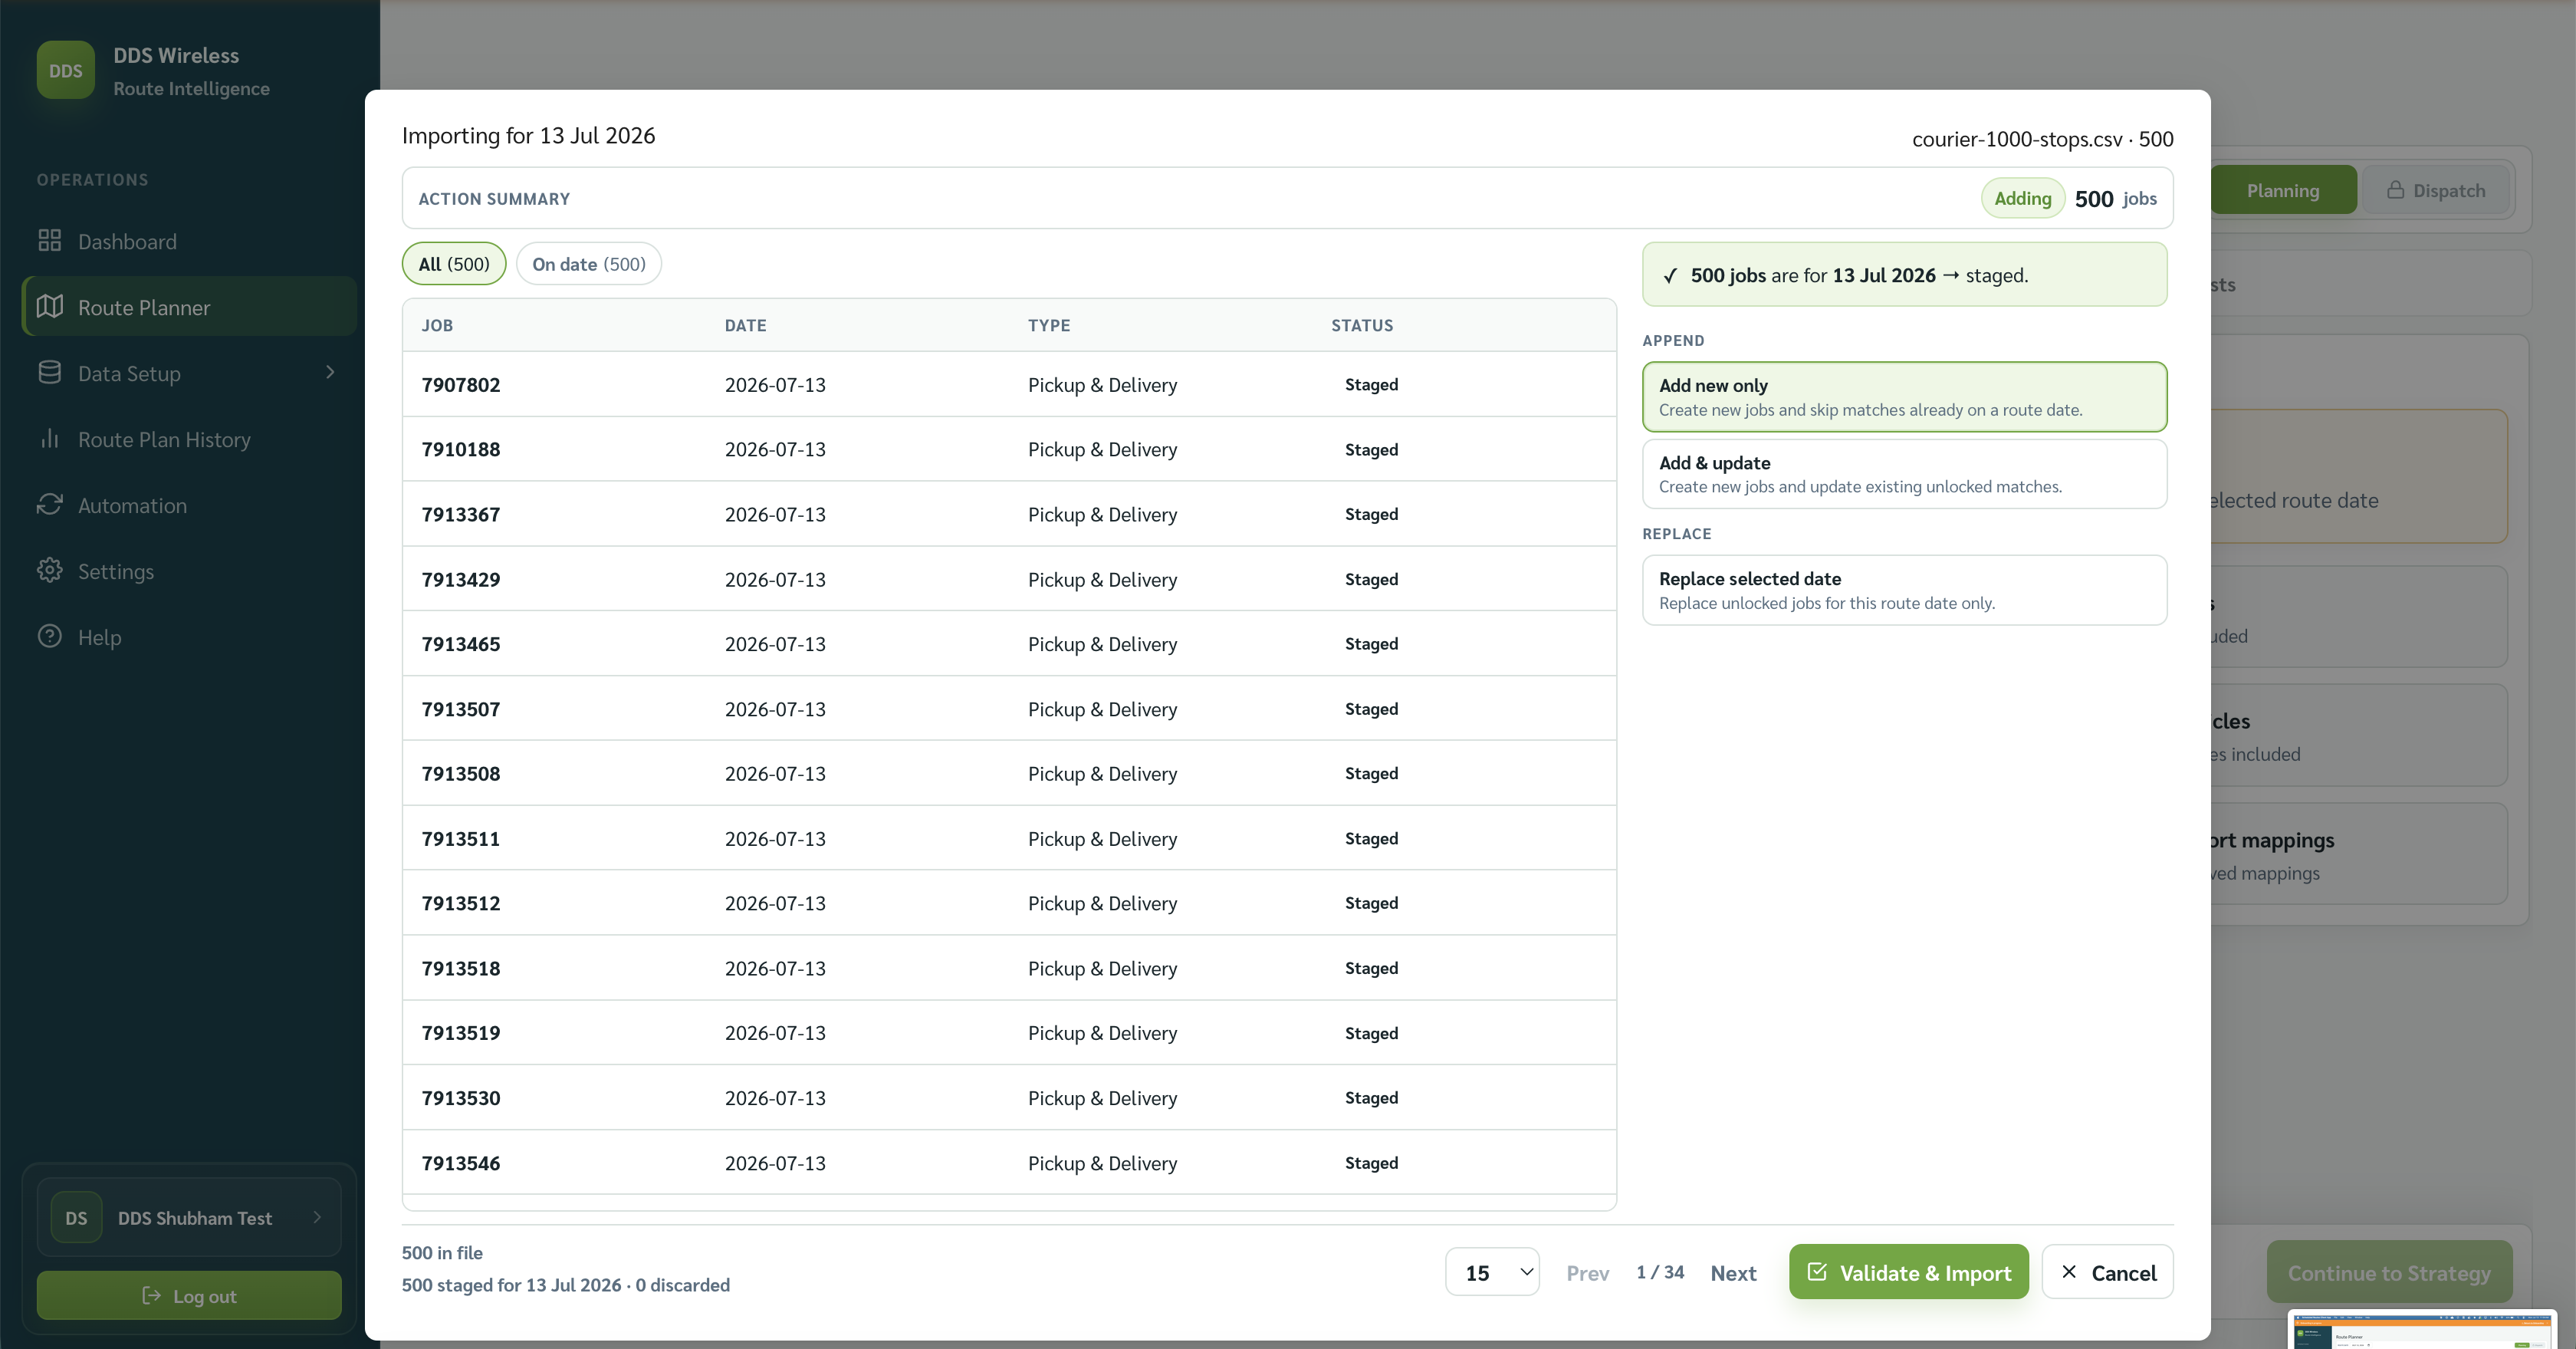
- Select Validate & Import, then confirm Jobs included, Vehicles included, and Needs attention before continuing.
Result
Today's jobs are ready for strategy selection. You don't reselect the mapping each day — once a job profile exists, Route Planner uses it automatically to read files with the same layout, so daily imports are just browse and validate.
Related: Saved mappings · Job file reference · Daily planning workflow · Upload failed or mapping not recognized