Custom export formats
Applies to v1.7+ · ~4 min read · Export and manifests
Create an export profile from a representative output template when the built-in manifest layout does not match your operation.
Create the profile
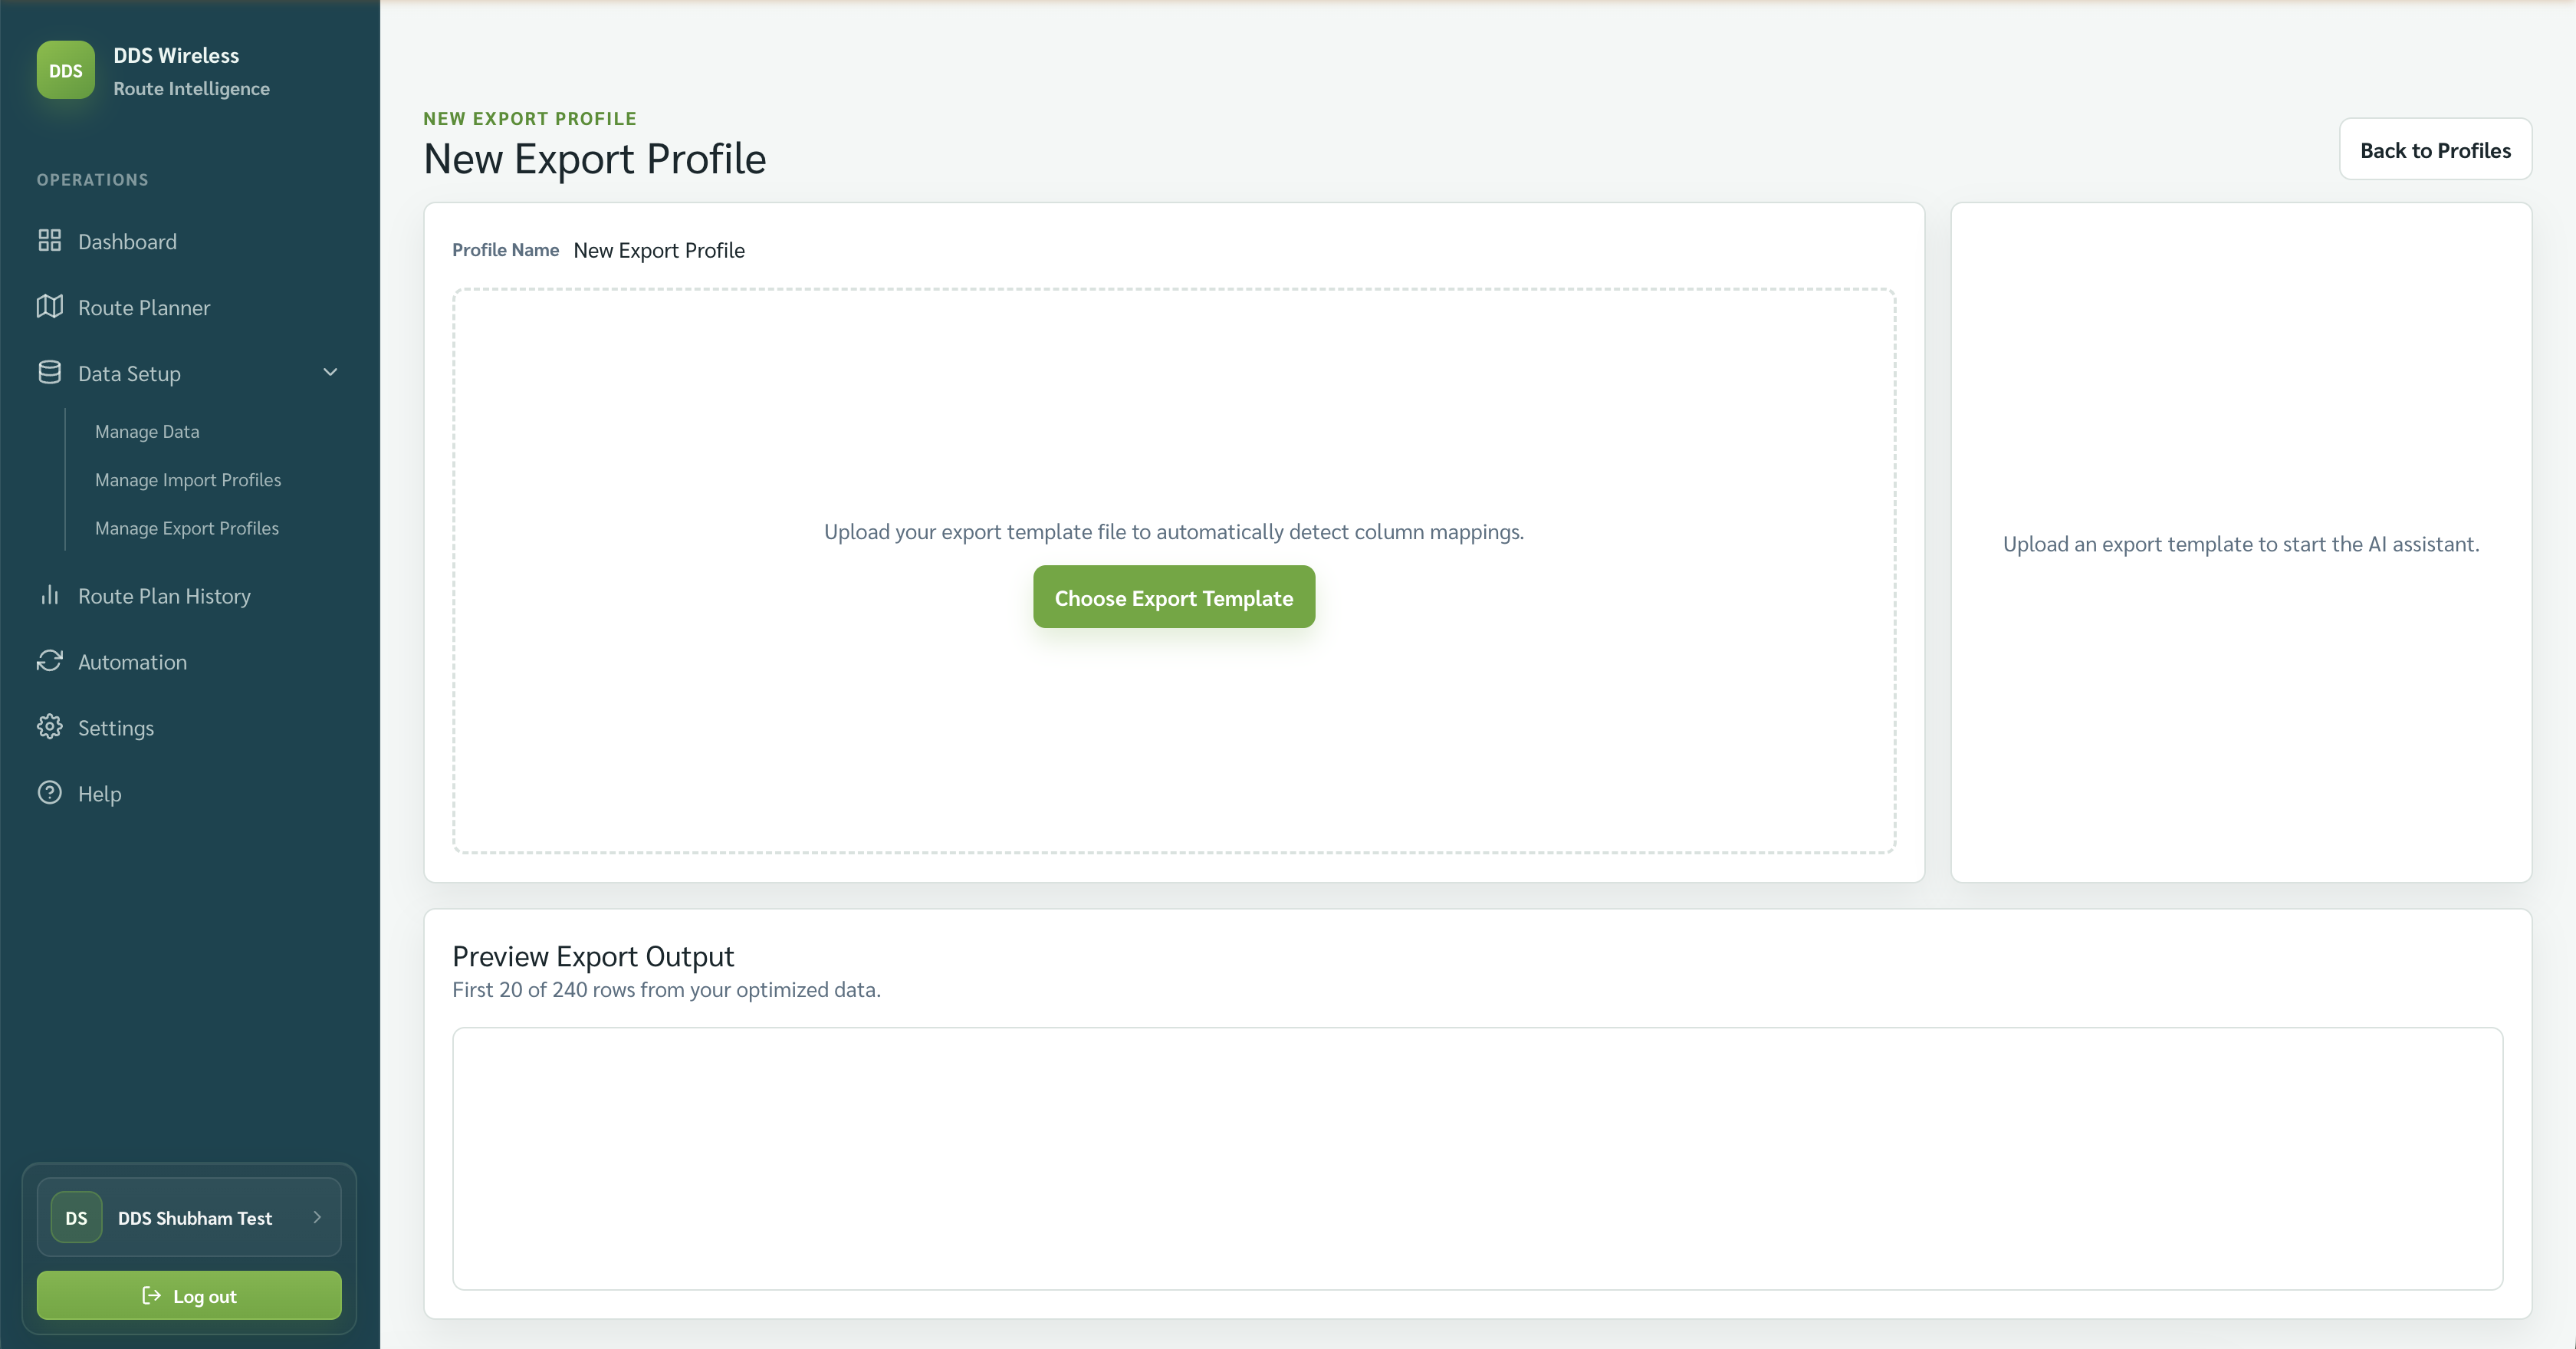
- Go to Data Setup → Manage Export Profiles.
- Select New Profile.
- On New Export Profile, select Choose Export Template and upload the example output file.
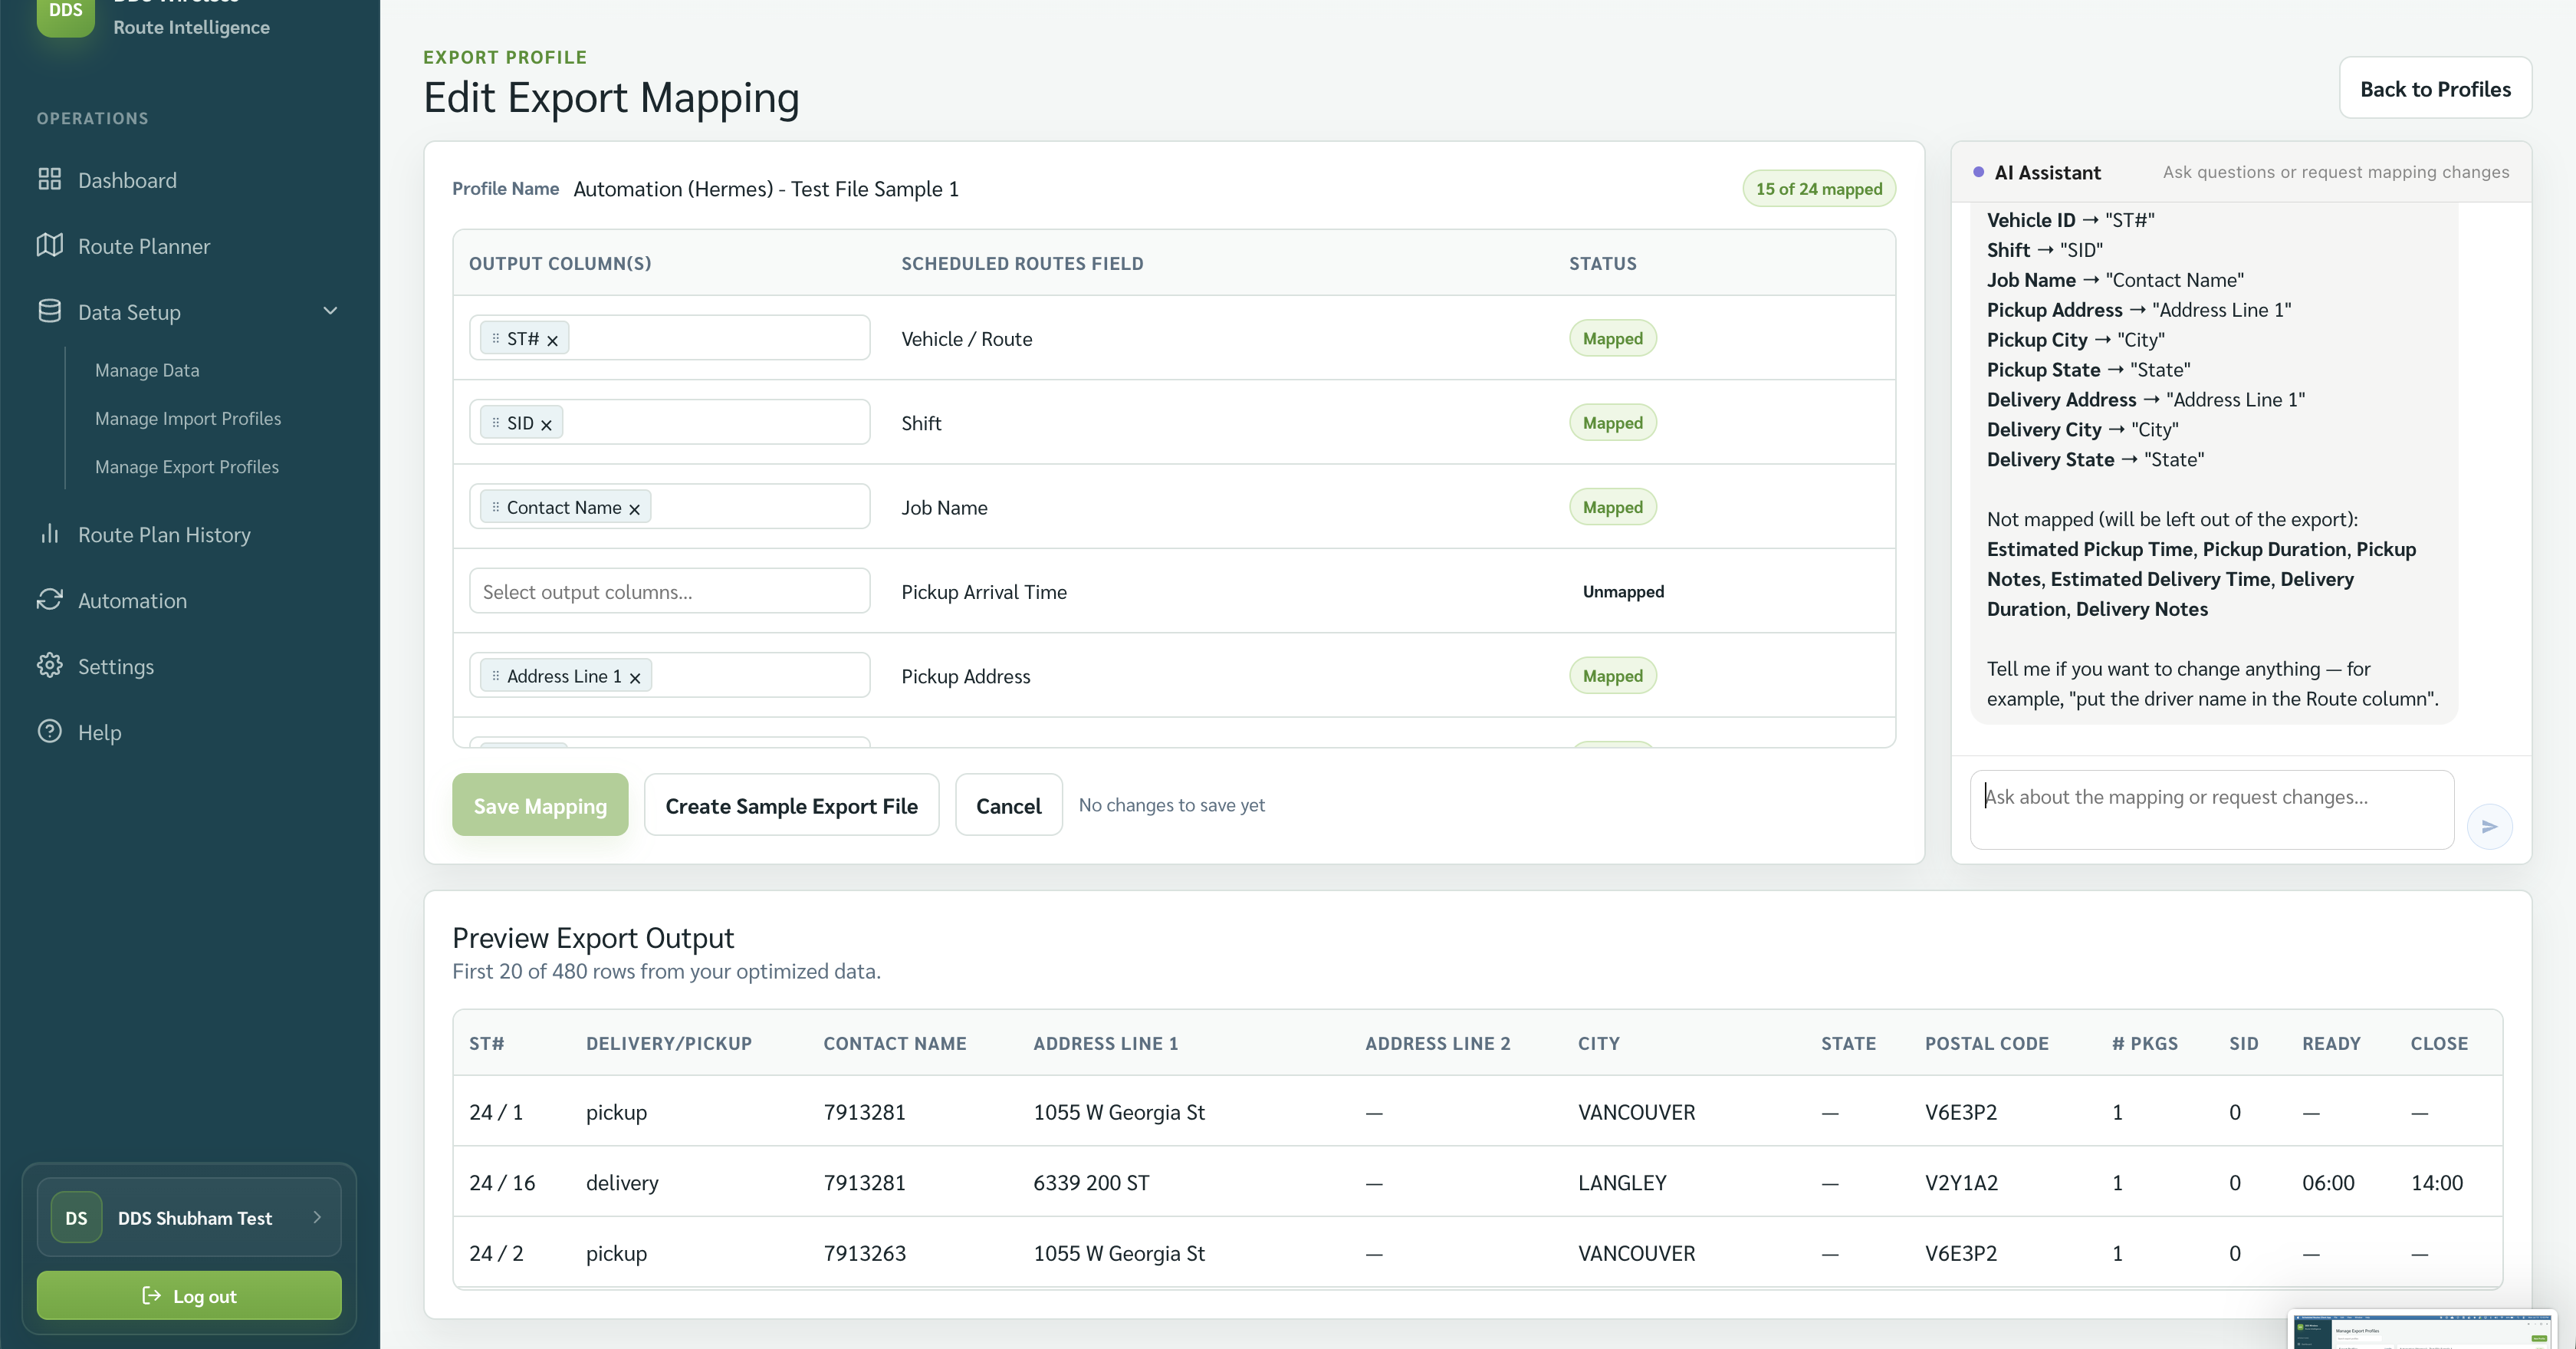
- Review the mapping and the Preview Export Output.
- Correct unmatched output columns, then save the mapping.
Use representative data
Your example should contain the headings and order you want in the finished manifest.
Use the profile
Return to Export Manifests, choose the saved Export profile, select an output package, and export.
Profile names, file types, and onboarding
Export templates can be CSV, XLS, or XLSX. You can name a profile whatever you like; by default it takes the name of the file you upload. The Onboarding buttons are a gateway — they take you to this same profile-creation screen and return you to the wizard when you're done. You can also reach it any time from Data Setup → Manage Export Profiles.
Related: Manage export formats · Manifest field reference · Built-in exports